CRM Reports – Developing RDLC Reports for Microsoft Dynamics CRM

Any report, created for corporate needs, contains some necessary data, simple calculations and data presentation. CRM reports were designed specifically to clearly and conveniently show the data that already exist and conduct some minor calculations like summation.
Required software for CRM reports
To start developing RDLC Reports for Microsoft Dynamics CRM the following software is required:
- Business Intelligence Development Studio (BIDS). BIDS is an integral part of Microsoft SQL Server 2008 R2. It is the environment designed for developing RDLC reports.
If you have installed Microsoft SQL Server, check if it contains BIDS.
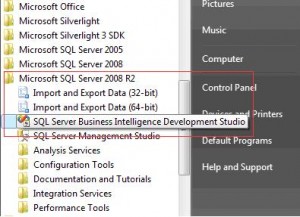
Please take a look at the Business Intelligence Development Studio image below:
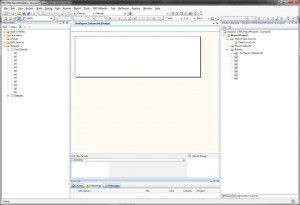
- The basic BIDS version is not compatible with FetchXML, consequently you’ll need to install “Microsoft Dynamics CRM 2011 Report Authoring Extension”.
To access CRM Online you’ll require:
- Connection string. Something like https://serveradress.crm.dynamics.com/;
- User name;
- Password.
Development order
In this subsection we describe the actions performed to create CRM Online Report. You are free to change the order of their execution or perform them in a different way utilizing other applications.
Report development consists of two major tasks: obtaining data from CRM and displaying it correctly with some minor calculations. This article is designed for beginners, so we will provide a detailed workflow applied for CRM reports development.
1. Design report’s visual appearance.
Define how your CRM reports should look, taking into consideration user’s demands and wishes.
2. Define what data should be retrieved from CRM online.
- Entities;
- Fields or aggregated values.
Note: Use existing fields, not requiring formatting and utilizing aggregating functions or any other calculations, if possible.
3. Create DataSet — FetchXML query
- It’s preferable to extract all the data using one dataset; don’t use the additional datasets
- It’s preferred to obtain fewer data at this stage, don’t extract unnecessary fields and records. You can use filter conditions in FetchXML.
- You can create calculated fields by using fields retrieved from CRM and formulas allowed in RDLC report.
4. Define and describe CRM report parameters
Usually these parameters are used for filtering or choosing view options.
- Default value
- Parameters type and visibility
5. Think over the reports visual structure
When you already have datasets, you can think over the reports visual structure again and then fill in the CRM report with necessary elements: tables, matrixes, textboxes, charts etc.
- Generally, tables with grouping possibilities and subtables should be used (and matrix if necessary).
6. Fill in visual elements with data
- Connect datasets to the tables.
- Insert data into the visual elements.
- Add labels.
7. Formatting
- Change styles
- Formulas for formatting
- Formulas for reflection
- Visible
- Font, background etc.
8. Testing — Preview
9. Publishing and testing online
10. Edit the existing report
- It’s impossible to add pre-filtering to the existing report. So you should remove the old report and create a new one.
Practical issues of CRM report
Important remarks:
- Two fields in dataset are created for every entity attribute: <field name> — string field and <field name>Value. The type of the last one is the one defined in CRM.
- The value of width, height, etc. must be set with specifying units: cm, in, pt; no unit by default.
- FetchXML is case-sensitive.
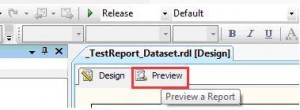
- Report can be launched/viewed in BIDS without pressing F5 or“Start Debugging” button. You can simply click the “Preview” tab.
- Use parts of the existing report for the new reports
- Use the ability to directly edit the XML. In some cases, it’s faster and easier, but you need to understand the structure of the XML file.
- Table layout
Keyboard Shortcuts:
- Ctrl+Alt+D — open “Report Data” window
- F7 — open XML editor for RDLC file
- Shift+F7 — open report designer
You need to select an appropriate Page and CRM report’s body sizes so that they look similarly in printed copies.
- Remember that Body width and height should be less than Page’s sizes minus Page’s borders.
Normal and printed copies should be both tested in order to assure that their look coincides. Use “Print Layout” button to switch between print and normal modes.

Limitations
- You can obtain only 5000 records at a time.
- You can’t use all the functions available in ordinary RDLC reports in CRM Online. Please, find a list of function allowed in CRM 2011 (5) enumerated in this article
- Paging can’t be used together with aggregate function
- It’s impossible to obtain only attributes while using aggregation. All the fields should be aggregating, group or order.
- Subreport which doesn’t fit on one page can’t be displayed correctly.
- Subreports amount is limited
- You can’t control how the parameters are displayed
- You can’t use shared Data Sources. This is logical, because when the report is loaded in CRM, it will contain only a link to data source, placed on your computer.
FetchXML
Fetch is a proprietary query language used in Microsoft Dynamics CRM. It’s based on a schema describing the language capabilities. You can download it via link (1). Please take a look at what it includes on the picture below.
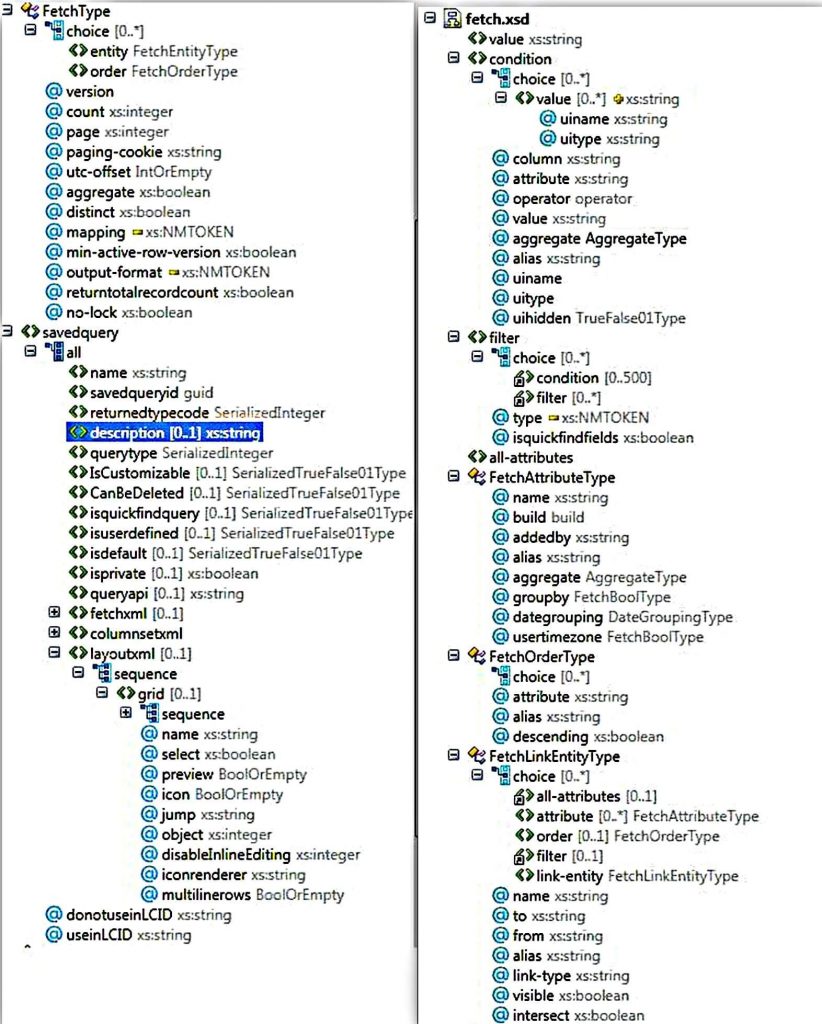
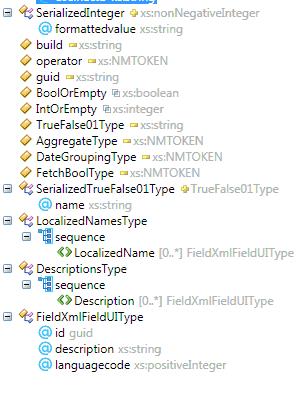
Using FetchXML is necessary in a number of situations with CRM 2011. Typically, the need for FetchXML arises first when you build custom SQL Server Reporting Services (SSRS) reports. That’s because FetchXML-based reports are the only option in CRM Online. The FetchXML language supports query capabilities similar to query expression ones.
First of all, we will show you a sample of FetchXML query.
<fetch version=”1.0″ output-format=”xml-platform” mapping=”logical” distinct=”false” count=’1000′>
<entity name=”invoice” enableprefiltering=”1″ prefilterparametername=”InvoiceParam”>
<attribute name=”invoiceid” />
<order attribute=”invoicenumber” descending=”false” />
<link-entity name=”customeraddress” from=”parentid” to=”contactid” link-type=”outer” alias=”customeraddress”>
<attribute name=”country” />
<filter type=’and’>
<condition attribute=’addressnumber’ operator=’eq’ value=’1′ />
</filter>
</link-entity>
<link-entity name=”invoicedetail” from=”invoiceid” to=”invoiceid” visible=”false” link-type=”outer” alias=”InvoiceItem”>
<all-attribute />
<link-entity name=”product” from=”productid” to=”productid”
visible=”false” link-type=”outer” alias=”product”>
<attribute name=”name” />
</link-entity>
</link-entity>
</entity>
</fetch>
- The request starts with <fetch>tag
- Count attribute is a number of records received by this request (maximum value – 5000).
- <entity> – you can have only one tag <entity> in the query; it says what entity you want to retrieve records from.
- name – name of entity is the field’s name. Remember also that FetchXML is case-sensitive; in the sample name=”contact”
- enableprefiltering

- <all-attributes/> — retrieve all attributes. It is an analog of SQL operator “*”.
- <attribute> — fields
- Name — field’s name
- <link-entity> — related entity. It is an analog of SQL “join”. One <entity> tag could contain few <link-entity> attributes
- name — name of related entity
- from — field’s name of the linked entity (<link-entity>)
- to — field’s name of main entity (<entity>)
- link-type — ‘inner’ or ‘outer’
- alias — in dataset prefix that would be added to all fields.
- <order>
- attribute — order will be applied on this field
- descending — true or false
- <filter>
- type — “and” / “or”
- <condition>
- attribute — same as in <order>, filter will be applied on this field
- operator — samples: “eq”, “on-or-after”, “on-or-before” “in”
- value — used in operator, e.g. if we want to apply condition “equal to Dublin”, we will use operator “eq” and value “Dublin”
Elements description
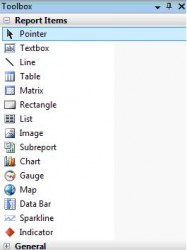
Take a look at the list of elements you can use in your CRM reports below. Table and textbox are the most useful.

- Table can be used with such useful functions like grouping and embedded tables.
- Matrix can only be used for a single dataset.
- Subreports can be rarely used, while they overload the system. After 30 subreports you’ll obtain an error message. Subreports are convenient for permanently repeated titles.


Custom CRM Software Upgrade
Migration to Cloud, .NET Conversion, UI improvement, CRM integrations


