Creating Separate Back Stacks for Android Applications Tabs using Fragments

The Problem Outline
Suppose we have a simple Android application with several tabs. Standard solution that uses Fragments and ActionBar to organize tabs, move between them and manage common back stack for the main activity works fine as long as each tab of the app has only one screen. But when you have to be able to freely navigate between both different tabs and different screens within a single tab, the trouble arises.
More specifically, problems with switching back and forth between the app tabs start to happen when there’s a need to simultaneously use a “horizontal” navigation between the tabs and a “vertical” navigation inside the tabs that contain several screens-fragments. In such cases regular implementation of the Back buttonbehavior has been known to result in “mixing” content from different tabs, a black empty screen or in app displaying incorrect content (e.g., the content of some other tab is suddenly shown). This problem is caused by the fact that the Back Stack (which is generally just a stack of all the activities/fragments arranged in the order in which each activity/fragment has been opened) is common between all tabs, and it is never rearranged. So the Back button doesn’t remember the order in which you’ve visited screens (fragments) across every tab and just pops the last thing that has been added to the back stack every time it is clicked.
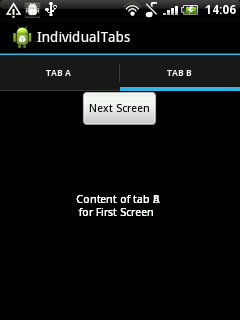
Here are some examples of the Back button messing up the app screen:
 В В
В В 
Solution: use a hashmap to manage separate back stacks for fragments in different tabs.
To be able to solve the navigation problem we will implement separate back stack for each tab. Specifically, we’ll maintain custom stacks by saving navigation history as a map of tab tags and screen fragments which belong to them. In addition to that we’ll have to implement some methods for managing fragments using this map.
Implementation example and some code explanations
To illustrate the usage of tabs and fragments mapping in practice we’ve prepared a little sample project. You can download all the source files using the links at the end of this article and inspect them closely, but we’ll explain some code in the article as well. Note that Support Library and ActionBarSherlock were used in the solution to provide code compatibility for devices that run Android 2.2 and newer.
MainActivity.java methods:
1. Creating tabs
The tabs are created in OnCreate methods in the host activity which extends FragmentActivity:
@Override
 protected void onCreate(Bundle savedInstanceState) {...}
2. Adding variables for keeping screen fragments and tabs tags
// Tabs associated with list of fragments
private Map<String, List<Fragment>> fragmentsStack = new HashMap<String, List<Fragment>>();
private String currentSelectedTabTag = "";
/**
 * Method is used to show the next fragment from current one
 * @param nextFragment The fragment object which will be shown
 */
 public void showFragment(Fragment nextFragment) {...}
/**
 * Method for adding list of fragments for tab to our Back Stack
 * @param tabTag The identifier tag for the tab
 */
 public void createStackForTab(String tabTag) {...}

/**
 * @param fragment The fragment that will be added to the Back Stack
 */
 public void addFragmentToStack(Fragment fragment) {...}

/**
 * Used in TabListener for showing last opened screen from selected tab
 * @return The last added fragment of actual tab will be returned
 */
 public Fragment getLastFragment() {...}

/**
 * Override default behavior of hardware Back button
 * for navigation through fragments on tab hierarchy
 */
 @Override
 public void onBackPressed() {...}
Using ActionBarSherlock in TabListener.java methods:
/** Constructor used each time a new tab is created.
 * @param activity The host Activity, used to manage the fragments
 * @param tag The identifier tag for the tab
 * @param clz The fragment's Class, used to instantiate the first fragment of tab
 */
public TabListener(SherlockFragmentActivity activity, String tag, Class<T> clz) {...}

public void onTabSelected(Tab tab, FragmentTransaction fragmentTransaction) {...}
Results
Now the Back button should work as intended and remove the last fragment of the respective tab from this tab custom back stack, and not the last fragment that has been added to the common back stack. Keep in mind that if you choose to use this approach, you’ll have to handle switching between portrait and landscape orientations (or you just can disable screen rotation in the AndroidManifest.xml).
Download the project files here: Separate Back Stacks for Android Fragments Tabs.zip
Helpful links


Mobile App Development
Writing software accessible anytime everywhere


