Creating Saved Views in Microsoft Dynamics CRM via Service Endpoints in Silverlight Applications

The saved views in Microsoft Dynamics CRM are a great and powerful tool for querying and displaying data. The designer for them contains many useful features: the ability to choose fields from the queried entity and related ones, sorting, different filters for queried and related entities, and some others.
But sometimes developers find themselves in situations when using just provided instruments is not enough to meet some business requirements. For instance, one of the most requested features of the Advanced Find is an ”IS IN” filter. Imagine that we need to query users with specified first names. If there are less than 10 first names we can use OR grouping in Advanced Find and default filters. But if we have more than 10 different first names entering all of them into designer form becomes cumbersome.
As a solution, we can construct a query in some type of custom application and upload Saved View to CRM. It can be a desktop application, a CRM plug-in or a Web Resource. In this walkthrough, we will use the SOAP endpoint in Silverlight Web Resource to connect to CRM.
First of all, we’ll need to construct a query for view. The saved view will use FetchXml for filtering data retrieval.
For our task, FetchXml will look like this: we will use a filter for only 2 first names. In code, we can construct a query and add many more filter conditions. The max number of conditions is 500 (tested with CRM Online Fall 13 v. 6.0.1.462).
<—– xml code ——>
Also, we need to define a grid for data presentation. See http://msdn.microsoft.com/en-us/library/gg334522.aspx for XML scheme. Let’s create a grid with First Name, Last Name and Birth Date. It is important to set correct names for the cells (see explanation below):
<—– xml code ——>
Let’s see what different attributes in the grid XML mean. We have the following attributes in the grid tag:
- name — should be the plural entity name or just “resultset”
- object — entity Object Type Code: can be found in the entity’s metadata, which you can get via SOAP Retrieve Metadata request to Organization Service, or in case of base CRM entity by checking it in the entity metadata pages on MSDN. There’s actually an even easier method to get the code: open any record of a desired entity type in your CRM and look at etc parameter in the URL, e.g. for the contact entity you will see something like this: https://YOUR-ORG-NAME.crm4.dynamics.com/main.aspx?etc=2&extraqs=&histKey=616537618&id=%7b05364DBE-AFB9-E311-95B5-D89D676486AC%7d&newWindow=true&pagetype=entityrecord#795450771. Here we can see that type code for the contact record is 2.
- jump — contains the name of the attribute used to filter rows using the alphabetical index at the bottom of the grid. Usually, it is the Name attribute
- select — this value should always be 1
- preview — indicates if the query represents a preview
- icon — indicates whether to display an icon with the grid or not
Inside of the grid tag we have a row tag. It declares a row in a grid and contains the following attributes:
- name — a singular entity name or just “result”
- id — attribute name that contains a unique id
Finally, the row tag has a collection of cell elements with the following attributes:
- name — the name of the field in CRM: it should be the same as in the FetchXML with the same aliases if they are used
- width — specifies the width of the cell in pixels
Our next step will be creating code for constructing requests and creating a saved view. The following code snippet shows how to create a User View in CRM.
public void SaveUserQuery()
{
var userQuery = new Entity();
userQuery.LogicalName = "userquery";
userQuery["name"] = "Test Saved View";
userQuery["description"] = "Description";
userQuery["fetchxml"] =
""
+ " "
+ "  "
+ "    "
+ "    "
+ "    "
+ "    "
+ "      "
+ "      "
+ "    "
+ "  "
+ "";
userQuery["layoutxml"] =
""
+ "   "
+ "      "
+ "      "
+ "      "
+ "   "
+ "";
userQuery["returnedtypecode"] = "contact";
userQuery["querytype"] = 0;

IOrganizationService service = SilverlightUtility.GetSoapService();
service.BeginCreate(userQuery, this.UserQueryCreatedCallback, service);
}

private void UserQueryCreatedCallback(IAsyncResult result)
{
var response = ((IOrganizationService)result.AsyncState).EndCreate(result);
}
So first of all, we should create a Saved View entity, the logical name of which is “userquery”. The fields that have to be set are as follows:
- Name — name of the Saved View, logical name: “name”
- Description — description of the view, logical name: “description”
- Fetch XML — FetchXml for data retrieval, logical name: “fetchxml”
- Layout XML — XML for data presentation, logical name: ”layoutxml”
- Returned Type — logical name of queried entity, logical name: “returnedtypecode”
- Query Type — for Saved Views must be set to 0, logical name: “querytype”
Now, the code should create an Organization Service and start a Create procedure.
Here’s a useful tip: if some data in your Saved View entity is not valid, the server often returns <sarcasm>very informative</sarcasm> exception: System.ServiceModel.CommunicationException: The remote server returned an error: NotFound, which doesn’t help much with understanding the cause of the error. If you see this error, try to double-check the XML format, values that you have specified there, and especially the logical names of fields – it can help in resolving the problem.
The other way of creating a Saved View is to use a REST endpoint in Silverlight. The following code snippet performs the same actions as the previous one but uses the REST endpoint:
private CrmRestContext context;

public void SaveUserQuery()
{
var userQuery = new UserQuery();
userQuery.Name = "Test Saved View";
userQuery.Description = "Description";
userQuery.FetchXml =
""
+ "  "
+ "    "
+ "    "
+ "    " + ""
+ "    "
+ "    "
+ "      "
+ "      "
+ "    "
+ "  "
+ "";
userQuery.LayoutXml =
""
+ " "
+ "   "
+ "   "
+ "   "
+ " "
+ "";
userQuery.ReturnedTypeCode = "contact";
userQuery.QueryType = 0;

var serverUrl = Microsoft.Crm.Sdk.Samples.ServerUtility.GetServerUrl();
this.context = new CrmRestContext(
new Uri(string.Format("{0}/xrmservices/2011/organizationdata.svc/", serverUrl), UriKind.Absolute));

this.context.AddToUserQuerySet(userQuery);
this.context.BeginSaveChanges(this.UserQueryCreatedCallback, null);
}

private void UserQueryCreatedCallback(IAsyncResult result)
{
var response = context.EndSaveChanges(result);
}
In this case, if there are any problems with data, we will receive System.Data.Services.Client.DataServiceRequestException. More info about the problem can be found in the InnerException property. Usually, it contains XML with the information about your specific problem.
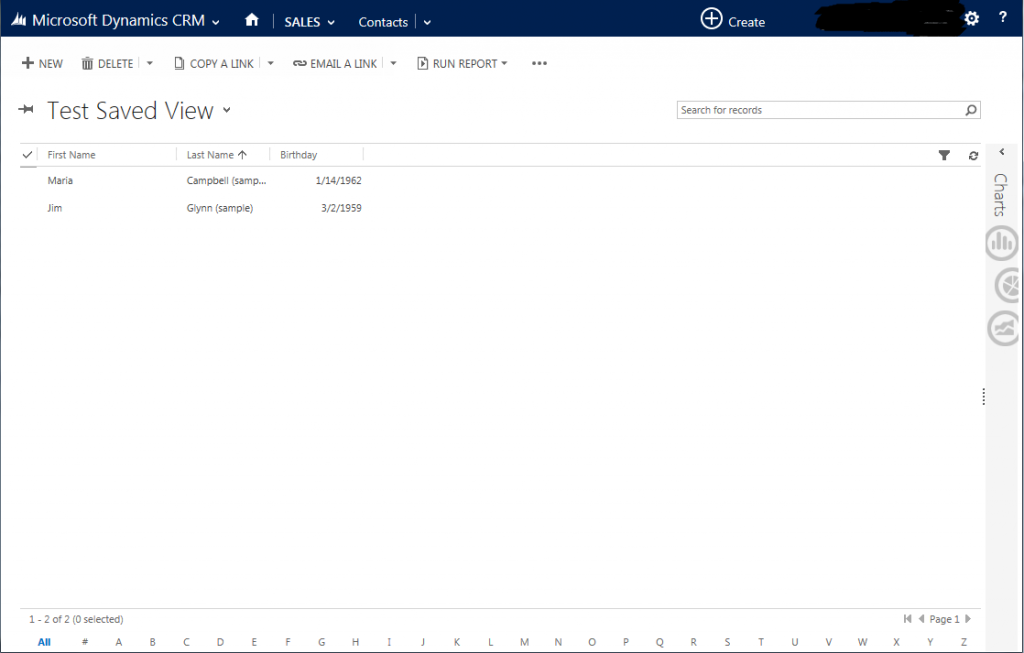
That’s all with the code part, and now we can test the created view on sample contacts in CRM. Note that you must refresh the CRM page to see a new view.

1. Newly Created View
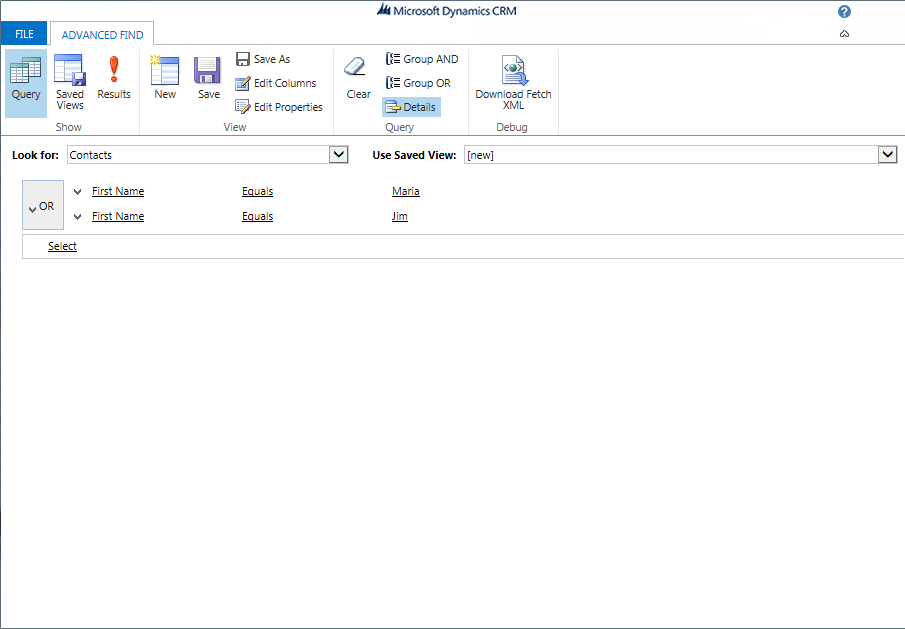
To find all Saved Views owned by the user go to Advanced Find tab and click Saved Views button on the ribbon.

2. Generated View
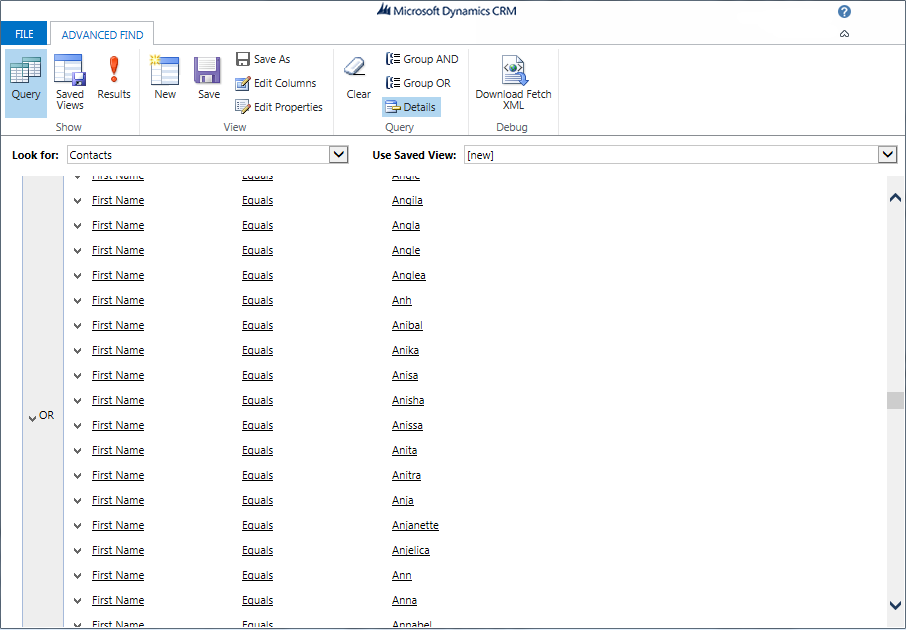
Now when we programmatically create a view, we can also add any number of required conditions based on the user input to it. For example, we can create a tool that will accept a comma-separated list of first names and generate a view with all those names used in the “Equals” condition. For 500 conditions we will see the following view:

3. View with 500 Conditions Generated
Thanks for reading!


.NET Development
Don’t underestimate the power of the right technology that the right .NET development company


